

Download PDF for Print
Introduction
The Georgia 4-H Forestry Field Day Contests include a number of events in which 4-H members compete in. Competition will be at two levels — senior (9th-12th grade) and junior (4th -8th grade). Cloverleaf members compete as junior team members. The events include: Tree Identification; Tree Measurement Estimation; Compass and Pacing (Juniors – pacing only); Forest Insect, Disease, and Disorder Identification; and Forest Site Evaluation Team Event (State Contest Only) The objectives of this team competition are to develop abilities and attitudes that help build better citizens and leaders. Participants will increase their knowledge of trees and forests, and develop some skills in forestry related activities. They will gain a better understanding of, and appreciation for, our forest resources and how they contribute to our economy and quality of life.
This manual is designed to provide information for both 4-H members participating in the contest and adult leaders assisting them. Seniors participate at advanced levels in three of the events. These include the following: Use of the compass in conjunction with the pacing event; Use of a different tree, forest insect, and disease information list; and Forest Site Evaluation (Whole team event at the State contest only)
The equipment needed for this project is not elaborate. The events have been chosen so that minimum equipment is needed and minimum “setting-up” time is required. The equipment needed for a complete contest is: Tree Scale Stick (tree measurement sticks and International 1/4 rule volume table found in this manual); Hand compass (most accurate allowed is Silva Ranger Type 15); Measuring tape (100-foot tape would be desirable but shorter tape will do); Small flags or markers (for marking the ends of compass course); A clipboard, writing instrument, and calculator for each participant; and a hand lens is desirable to help in the identification of tree, insect and disease specimens.
General Information
The Georgia 4-H Forestry Field Day contests are competitive events of forestry knowledge and skills. There are district/area and state competitions in Georgia with the state winners usually going to the National 4-H Forestry Invitational. The purpose of Georgia 4-H Forestry Field Day is to provide opportunities for 4-H Forestry members to:
• develop leadership talents and to work toward achieving character development and effective citizenship
• develop appreciation of the need for and importance of conserving woodlands as a source of products and services necessary for quality living
• and acquire information and understanding of practical forestry skills in forest management and utilization of forest products.
Although competitive in nature, the 4-H Forestry Field Days are managed as an extensive forestry educational experience. They provide an opportunity for exploration of the broad aspects of forestry and encourage and promote better forestry knowledge for 4-H’ers. There are many general and specific values and perceptions developed through these events. Preparation of youth for 4-H Forestry Field Day helps youth to:
• present, identify, and locate the renewable resources of the forest environment such as forest products, water, outdoor recreation, wildlife, and selected grazing
• establish a natural resource value system
• help 4-H landowners understand the techniques of managing their land and improving the understanding of 4-H’ers as potential landowners
• furnishes facts and scientific procedures for future adults. 4-H’ers will learn to weigh and understand renewable resource management needs.
Furthermore, the competitive team approach which is used in 4-H Forestry Field Days, develops the following benefits:
• intensified learning opportunities using correct management information and factors concerning forest resources
• standardizes, or presents, similar references, materials, guides, and understanding of tree identification, forest measurements, and use of silvicultural problems of management, insects, diseases, etc.
• encourages rural, suburban and urban teams to share ideas and visit potential management areas with a new perspective of 4-H forestry
• provides new insight to senior members who serve as team leaders with younger 4-H members in beginning forestry projects
• allows team members to formulate goals and discuss management procedures with other 4-H’ers and with professional land managers
• provides a new dimension for older 4-H member activities and incentive for younger members beyond the present project-oriented program.
Tree Identification
Learning to identify trees is necessary if you are to be successful in the 4-H Forestry Field Day Contest. In this event, team members will identify leaf, branch or twig samples from the “official” species list.
Contest Rules
1. 4-H’ers will identify 10-25 trees from branch, twig or leaf specimens that will be taken from the “official” species list found in this manual.
2. 4-H’ers will be judged on the accuracy of identification and spelling of correct common names. Scientific names will not be required. Incomplete names will be counted as wrong. For example, “dogwood” instead of “flowering dogwood” will be counted wrong. Common names must be the same as that on the Official Lists in order to be counted correct.
3. 4-H’ers will be given a specific time to identify the tree specimens.
4. 4-H’ers may use a hand lens to aid in the identification of the sample. However, 4-H’ers may not touch, move or handle the samples during the contest.
5. 100 points will be allotted for the tree identification portion of the contest. Points will be allocated based on the number of specimens provided. Incomplete or misspelled, but identifiable common names will receive ½ credit. Spelling, including capitalization, must be the same as that on the Official Lists in order to receive full credit.
Using Leaves to Identify Trees
Although there are several parts of a tree which provide clues as to its identity, the part used most often is the leaf. Regardless of where a particular kind of tree is found, its leaves will look like all the rest of its kind. You will find that your enjoyment of the outdoors will steadily increase as you learn to recognize the different kinds of trees. Trees may be recognized on sight when one learns to know them by their leaves. Trees of the same kind (species) always have leaves of the same shape, color, veining, arrangement on the twig, etc. Sometimes the size will be different because of the amount of water, plant food and sunshine available to the tree or part of the tree where the leaf grew.
Five Types of Leaves and their Parts
When you begin to look carefully at the leaves from trees found in Georgia, or any place in North America, you will discover that there are only five different types. When you have learned to recognize these five types, you are well on your way to learning how to identify trees by their leaves. A very important step is to learn how to recognize a complete leaf. What is sometimes called a leaf is in reality only a leaflet (part of a whole leaf). By following a simple system, you can always tell whether you are dealing with a whole leaf, a part of a leaf or more than one leaf. Start at the very tip of what you believe is a leaf. Follow the leaf to its stem and down the stem until it becomes fastened to the twig. A complete leaf is everything from the very tip until it becomes fastened to the bark-covered twig. In most cases there is also a bud at the point where the leaf grows from the stem. This will become clear as we take a closer look at the five types of leaves.
Simple Leaf
This is the most common type of leaf and is the type found on oaks, elms, maples, willows, redbuds, dogwoods and many other kinds of trees. Look
carefully at the parts of the leaf. All simple leaves will have the same parts. The size, shape and color of the leaf will be different from one tree to another and
the margin edge may be smooth or rough (serrated) in others. The shape of the base and the length of the petiole (stem) will vary with different kinds of trees. A simple leaf has only one complete leaf blade from the apex (tip) to where the petiole is fastened to the twig.
Pinnately-Compound Leaf
Many kinds of trees found in Georgia have pinnately compound leaves such as hickory, walnut, ash, and others. Look carefully at the parts of this leaf. All compound leaves will have the same parts. Start at the tip of a leaflet and trace to its base. You will not find a twig or a bud at this point so trace on down to the rachis and then to the petiole where it is attached to the twig. All of the parts are fastened to the rachis is one leaf. You must look at the whole leaf before you can identify it. Often, the number of leaflets fastened to the rachis will separate one kind from another. Trying to identify a tree by using only a part of the leaf, such as a leaflet, will only prove confusing.
Bi-pinnately Compound Leaf
Bi-pinnately compound type leaves, sometimes called twice-pinnate compound, form another tree group. There are fewer of these trees than in other groups. Mimosa is an example of this leaf type. Honey locust may have both pinnately and bi-pinnately compound leaves on the same tree. You will note that the leaflets are attached to lateral veins branching from the rachis thus resulting in a leaf which is two times (bi-pinnately) compound.
Palmately Compound Leaf
Buckeye is the only native Georgia tree that has this type of leaf. The shape of this leaf can be easily remembered since the leaflets are attached at a common point much like the fingers are fastened to the palm of the hand. Trees with the four types of leaves discussed to this point are referred to as BROADLEAF TREES. This term simply describes the general appearance of the leaves. That is, they are more nearly wide and flat than narrow and round. This type of tree also loses its leaves in the winter. EVERGREEN TREES, discussed next, get their name from the fact that they remain green all year round and they do not lose their leaves.
Needle, Awl, or Scale like Leaf
These leaf shapes are those found on evergreens. Magnolias and hollies are two species of trees that have a broad leaf which remains on the tree and stays green during the winter. The leaves of the pines, spruces and cedars are easy to recognize in either the summer or winter for their shapes are different from all other trees. All pines native to Georgia have bundles which contain two or more needles and may even have bundles of both 2 and 3 needles on the same tree.
Other Things Used to Identify Leaves
Now that you have learned about the five types of leaves you are ready to look at some of the other things that make it possible to tell one kind of leaf from another.
Leaf Shape
Some trees can be recognized easily by the shape of their leaves. You should carefully study the shapes of the leaves described in the identification manual you are using. Live Oak, Georgia’s official state tree, has a leaf which is oblong. Other examples are sweetgum which is star-shaped and the post oak whose leaves resemble a cross.
Leaf Margins
The margin is the edge of the leaf and is an important Characteristic. Most manuals separate the margins into five types.
Leaf Surfaces
Most leaves are smooth and green, but some have a whitish “bloom” (which can be rubbed off with the finger) on the undersurface. Other leaves are hairy or velvety. A few, like the slippery elm, have an upper surface which is very rough and feels like a piece of sandpaper. Learning to identify trees can become a fun and educational project if you first learn the basic characteristics of leaves. You have the opportunity to increase your awareness of the world around you. By developing an appreciation for trees through learning tree identification, you can be of help to your friends and others who are interested in learning about trees.
Reference Material
Arbor Day Foundation Website ( What Tree is That? – Online Edition)
Official Tree List for Georgia Forestry Field Day
Junior and Senior Trees
Common Name/ Scientific Name
| American basswood | Tilia americana |
| American beech | Fagus grandifolia |
| American elm | Ulmus americana |
| American holly | Ilex opaca |
| American sycamore | Platanus occidentalis |
| baldcypress | Taxodium distichum |
| black cherry | Prunus serotina |
| blackgum | Nyssa sylvatica |
| black locust | Robinia pseudoacacia |
| black oak | Quercus velutina |
| black walnut | Juglans nigra |
| black willow | Salix nigra |
| boxelder | Acer negundo |
| buckeye | Aesculus spp. |
| catalpa | Catalpa bignoniodies |
| chestnut oak | Quercus prinus |
| common persimmon | Diospyros virginiana |
| eastern cottonwood | Populus deltoides |
| eastern hemlock | Tsuga canadensis |
| eastern redbud | Cercis canadensis |
| eastern redcedar | Juniperus virginiana |
| eastern white pine | Pinus strobus |
| flowering dogwood | Cronus florida | |
| live oak | Quercus virginiana | |
| loblolly pine | Pinus taeda | |
| longleaf pine | Pinus palustris | |
| mockernut hickory | Carya tomentosa | |
| pecan | Carya illinoinesis | |
| pignut hickory | Carya glabra | |
| post oak | Quercus stellata | |
| red maple | Acer rubrum | |
| red mulberry | Morus rubra | |
| river birch | Betula nigra | |
| sassafras | Sassafras albidum | |
| shortleaf pine | Pinus echinata | |
| silver maple | Acer saccharinum | |
| slash pine | Pinus elliotti | |
| southern magnolia | Magnolia grandiflora | |
| southern red oak | Quercus falcata | |
| sweetgum | Liquidambar styraciflua | |
| Virginia pine | Pinus virginiana | |
| water oak | Quercus nigra | |
| white oak | Quercus alba | |
| yellow-poplar | Liriodendron tulipifera | |
Additional Trees for Seniors
| American hornbeam | Carpinus caroliniana |
| blackjack oak | Quercus marilandica |
| butternut | Juglans cinerea |
| cucumbertree | Magnolia acuminata |
| deodar cedar | Cedrus deodara |
| Georgia hackberry | Celtis tenuifolia |
| ginkgo | Ginkgo biloba |
| hawthorn | Crataegus spp. |
| hazel alder | Alnus serrulata |
| honeylocust | Gleditsia triacanthos |
| mimosa | Albizia julibrissin |
| northern red oak | Quercus rubra |
| northern white-cedar | Thuja occidentalis |
| overcup oak | Quercus lyrata | |
| pitch pine | Pinus rigida | |
| red spruce | Picea rubens | |
| sawtooth oak | Quercus acutissima | |
| scarlet oak | Quercus coccinea | |
| slippery elm | Ulmus rubra | |
| sourwood | Oxydendrum arboreum | |
| sugar maple | Acer saccharum | |
| sweet birch | Betula lenta | |
| white ash | Fraxinus americana | |
| willow oak | Quercus phellos | |
| winged elm | Ulmus alata | |
| yaupon holly | Ilex vomitoria | |
Tree Measurement Estimation
In this event, team members will find the usable amount of timber in a given plot of land. This is done by measuring the size of up to 5 trees that have been designated for the contest. 4-H’ers then estimate what the total usable acreage of timber would be from using the measurements of those marked trees.
4-H’ers will find:
1. Diameter at breast height for each tree (DBH)
2. Merchantable height for each tree (number of usable 16-foot logs)
3. Volume of each tree in board feet
4. Total Plot Volume Per Acre
To obtain measurements 4-H’ers will use an official tree scale stick (it looks like a small yardstick). If you do not have these available, they can be purchased through forestry supply catalogs or online from companies such as Forestry Supply Inc. or Ben Meadows Co. Contestants are NOT allowed to use any other type of instrument to measure the trees, including diameter tapes and calipers. Contestants will also need to use a calculator for this event.
Contest Rules
1. A fixed radius plot will be selected and designated for the event. Contestants will be required to give the total volume of sawtimber per acre as determined from the sample plot. The plot may be 1/10, 1/5, or ¼ acre. The concept of an expansion factor will be used to determine total volume per acre.
2. Up to five trees will be marked for the contest. 4-H’ers will estimate the diameter, merchantable heights, and volume for each tree. For the purpose of this contest, tree diameters will be measured and recorded in even 2-inch diameter classes. Tree height will be measured in 16-foot logs to the nearest ½ log (8ft). The smallest tree will be 10 inches in diameter and one log merchantable height.
3. Tree volume will be found in the International ¼ inch volume table furnish at the contest. Do not use the volume table on the tree scale stick. A copy of the table can be found in this manual.
4. 105 points will be allowed for the correct volume per acre. Remember, the total volume in the plot must be multiplied by a factor (4 for a ¼ acre plot) to determine the volume per acre. Points will be allocated based on a ± percentage of the original volume. Point allocation will be as follows:
Correct volume = 105
± 5% of volume = 100
± 10% of volume = 90
± 15% of volume = 80
± 20% of volume = 70
± 30% of volume = 60
± 40% of volume = 50
> 40% of volume = 40
Measurement of Standing Trees
When trees are sold as harvested products (sawlogs, veneer logs, or pulpwood), the sale is generally based upon a measured volume. The two measurements used to estimate the volume of a tree are diameter and height. Diameter of standing trees is measured by a time-honored custom, at 4-1/2 feet above ground on the uphill side of the tree (if the tree is on a slope). This is abbreviated as DBH (diameter breast height). Height of a standing tree might be measured as total (the entire height from ground line to the top) or merchantable. Merchantable height implies the ability to cut lumber, veneer, or other products from the logs. It is the distance from the stump height to the top of the merchantable material in the tree and varies depending on the products to be made from the tree. The basic unit of height measurement for sawtimber is the log, which is 16 feet in length.
Measuring Diameter
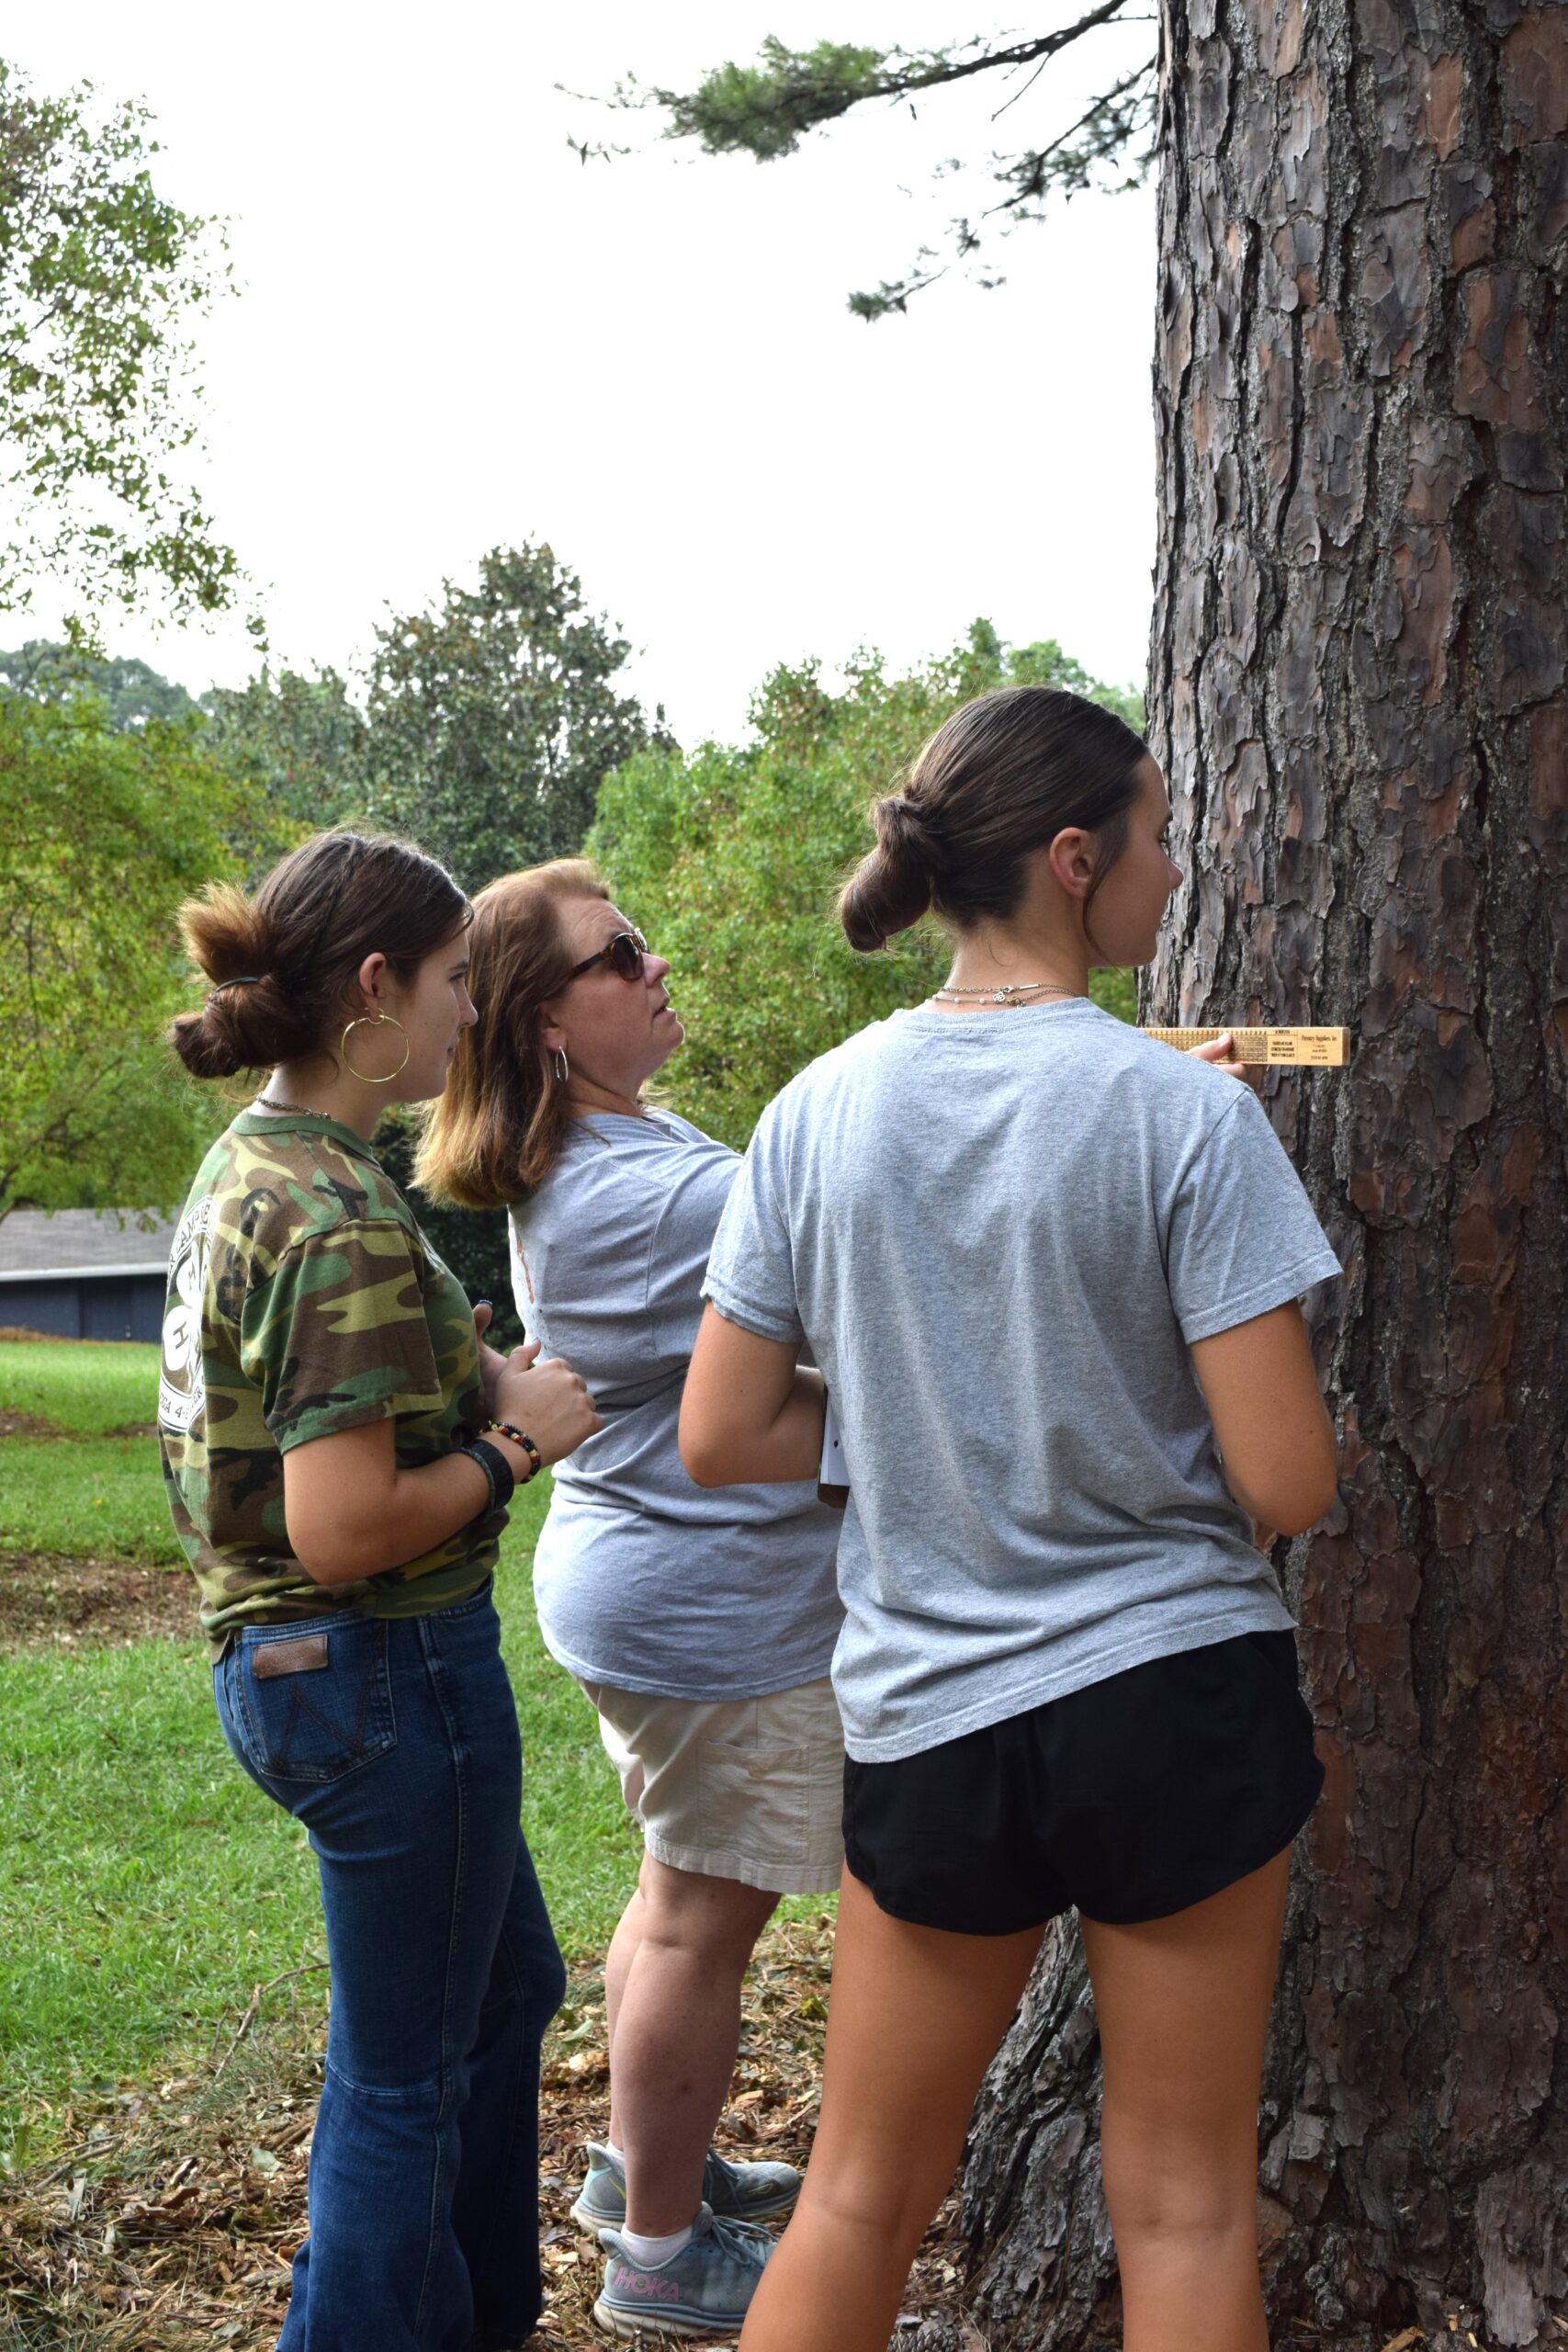
To measure diameter, foresters may use a caliper, diameter tape, or tree scale stick. Since the tree scale stick is to be used in the contest, the method of using it will be explained. Use the flat side of the stick, which reads, “Diameter of Tree (in inches).” The instrument on this side of the tree scale stick is called a Biltmore Stick. Hold the stick against the tree, perpendicular to the trunk, 25 inches from your eye at a height of 4 ½ feet above ground on the uphill side of the tree. Once the stick is placed against the tree, close one eye and line up the left end with the edge of the tree’s bark. Now, WITHOUT MOVING YOUR HEAD, look across the stick to the right-hand edge of the tree and read the diameter measurement at the point of intersection. Record the measurement by its proper even 2-inch diameter class. For example, if the tree measures between 15.0 and 16.9 inches it should be recorded as a 16 inch diameter tree.
Even 2-Inch Diameter Classes
If Diameter Measures Record As
9.0 – 10.9 10
11.0 – 12.9 12
13.0 – 14.9 14
15.0 – 16.9 16
17.0 – 18.9 18
19.0 – 20.9 20
21.0-22.9 22
23.0-24.9 24
Etc.
Merchantable Height
To measure height, foresters may use a clinometer, laser hypsometer, relaskop, or tree scale stick. Since the tree scale stick is to be used in the contest, the method of using it is explained. To measure the merchantable height of a tree, you should pace out 66 feet from the base of the tree to a point where the entire tree can be seen. It is a good idea to stay on the same contour as the tree or slightly up hill from it. Hold the tree scale stick so that the edge of the stick that reads “Number of 16-foot logs” faces you. The instrument on this edge of the tree scale stick is called a Merritt Hypsometer. The zero end should point toward the ground. Plumb the stick, at 25 inches from the eye. Sight the zero end to appear to rest at stump height. Stump height, for purposes of this contest, will be measured from one foot above the ground. DO NOT MOVE YOUR HEAD OR THE STICK. Look up the stick to a point where the top of the last merchantable cut would be made in the tree (8-inch top diameter, a major fork, or serious defect which affects greater than half the tree’s diameter at that point). Read the merchantable height to the nearest full half-log. For example, if the merchantable height is slightly more than 2 ½ logs you can record it as 2 ½ logs. But if the merchantable height is slightly less than 2 ½ logs you must record it as 2 logs. Practice on pacing is needed to find the 66-foot distance from the tree. The 25-inch distance from your eye to the stick is still the same as in measuring tree diameter.
Volume
Finding the volume of the tree in board feet is the easiest part of this event. All that needs to be done is to match up the DBH and Merchantable Height measurements that were taken by using a Tree Volume Table. This table is in chart form on the following pages. To determine volume for each tree, find the appropriate DBH in the first column and follow the row across until it matches the Merchantable Height that was found for that tree. Where these interest on the chart is the volume for the tree. The volume should be recorded on the score card. This needs to be repeated for each tree. At the contest the Tree Volume Table will be provided to 4-H’ers.
Total Volume Per Acre
At the contest, team members will give one number as their final answer. This number represents the total volume per acre. On the score sheet, it will note the size plot as either 1/10, 1/5 or ¼ of an acre. To find the total volume per acre, contestants must add up tree volume in board feet for all five trees and then multiple by the appropriate expansion factor. So, if you were told that the plot represents ¼ acre you would multiple your plot volume total by 4 to get the total volume per acre. The following is similar to the score sheet that
4-H’ers will use at the contest:
|
Tree Number |
DBH (inches) |
Merchantable Height (# 16′ logs) |
Volume (board feet) |
|
1 |
|
|
|
|
2 |
|
|
|
|
3 |
|
|
|
|
4 |
|
|
|
|
5 |
|
|
|
Total Plot Volume: ____________ (Plot = ¼ Acre)
Total Volume Per Acre: ____________
*Circle Your Answer
A correctly completed score card should look like the one below:
|
Tree Number |
DBH (inches) |
Merchantable Height (# 16′ logs) |
Volume (board feet) |
|
1 |
18 |
2 |
233 |
|
2 |
20 |
3 |
401 |
|
3 |
16 |
2 |
180 |
|
4 |
18 |
2 1/2 |
210 |
|
5 |
20 |
3 |
401 |
Total Plot Volume: 1425 (Plot = ¼ Acre)
Total Volume Per Acre: 5700
*Circle Your Answer
Volume Table
To use this table, first measure the diameter at breast height (DBH) of a tree and place it into the proper even 2-inch diameter class. Next measure the merchantable height of the tree in 16-foot logs to the nearest full half log. Read down the left-hand column until you come to the row containing the DBH. Then, move across from left to right until you come to the column containing the tree merchantable height at the top. At the intersection of that row and column you will find the merchantable volume of the tree. Read and record each tree volume directly and separately. FOR CONTEST PURPOSES, DO NOT USE THE VOLUME TABLE ON THE TREE SCALE STICK.
International ¼ inch Log Rule — Form Class 78
VOLUME (board feet) BY NUMBER OF 16-FOOT LOGS
| DBH | 1 | 1 ½ | 2 | 2 ½ | 3 | 3 ½ | 4 | 4 ½ | 5 |
| 10 | 36 | 48 | 59 | 66 | 73 | — | — | — | — |
| 12 | 56 | 74 | 92 | 106 | 120 | 128 | 137 | — | — |
| 14 | 78 | 105 | 132 | 153 | 174 | 187 | 200 | — | — |
| 16 | 106 | 143 | 180 | 210 | 241 | 263 | 285 | — | — |
| 18 | 136 | 184 | 233 | 274 | 314 | 344 | 374 | — | — |
| 20 | 171 | 234 | 296 | 348 | 401 | 440 | 480 | 511 | 542 |
| 22 | 211 | 290 | 368 | 434 | 500 | 552 | 603 | 647 | 691 |
| 24 | 251 | 346 | 441 | 523 | 605 | 664 | 723 | 782 | 840 |
| 26 | 299 | 414 | 528 | 626 | 725 | 801 | 877 | 949 | 1021 |
| 28 | 347 | 482 | 616 | 733 | 850 | 938 | 1027 | 1114 | 1201 |
| 30 | 403 | 560 | 718 | 854 | 991 | 1094 | 1198 | 1306 | 1415 |
| 32 | 462 | 644 | 826 | 988 | 1149 | 1274 | 1400 | 1518 | 1637 |
| 34 | 521 | 728 | 934 | 1119 | 1304 | 1447 | 1590 | 1727 | 1864 |
| 36 | 589 | 826 | 1063 | 1274 | 1485 | 1650 | 1814 | 1974 | 2135 |
| 38 | 656 | 921 | 1186 | 1428 | 1670 | 1854 | 2038 | 2224 | 2410 |
| 40 | 731 | 1030 | 1329 | 1598 | 1868 | 2081 | 2294 | 2494 | 2693 |
Compass and Pacing
Foresters are often required to estimate horizontal distances by the pacing method and to determine direction of travel by using a compass. These methods are very useful in cruising timber and finding property boundaries.
Contest Rules
1. Each 4-H’er should determine the number of paces he or she takes per 100 feet on a practice course prior to the contest. Pacing distances must be estimated using a normal walking stride. No heal to toe or other measurement is allowed.
• For the Junior Pacing portion of the competition:
1. 4-H’ers may use a calculator to aid in calculating their final answer for the course. In addition, a 4-H’er may use only a clipboard and pencil.
2. The total distance for the course should be recorded on the official score card and turned into the station supervisor.
3. 100 points will be allowed for the pacing portion of the contest. Points will be allocated based on a + margin of error of the actual distance. (Correct distance = 100, + 5 feet = 95, + 10 feet = 90, + 15 feet = 85, etc.)
• For the Senior Compass and Pacing portion of the contest:
1. 4-H’ers may use a calculator to aid in the calculation of their pacing distances. A compass, clipboard and pencil are the only other equipment that can be used.
2. A Silva Ranger mirror sighted type azimuth or quadrant compass should be used for the contest. Similar type hand-held compass may be used as long as they are neither more accurate nor more sophisticated than the Silva Ranger. Participants should provide their own compasses.
3. Each contestant will be given a set of 3 compass bearings and distances. From a designated starting point, 4-H’ers will follow those bearing and distance to determine an ending point that will be recorded on the score card.
4. 100 points will be allocated for the compass and pacing portion of the contest. 100 points will be awarded for reaching the correct ending point and points will be deducted based on the distance from the correct ending point. For example, if the correct ending point is 25, 100 points would be awarded for 25, 95 points would be awarded for 24 or 26, 90 points would be awarded for 23 or 27, etc.
Pacing for Juniors
All maps and land surveys express the distance between two points as the horizontal distance, which is the distance measured on the level. Pacing is an easy, but crude, method of determining ground distances. A pace is two steps. On level, open ground pacing can become fairly accurate with practice. An individual’s pace is generally consistent (for that individual) when walking at a natural stride. However, on slopes or in brushy or rocky areas, its accuracy diminishes; therefore, you should practice on different terrain to establish an accurate pace for situations encountered in the field. The tricky part of this event is learning to be consistent when you pace and you will need to figure out how far you travel with each pace. This is done by calculating how many paces it takes you to walk 100 feet. By doing this, then you can the figure out how many feet any distance is by simply walking it off and applying your personal pace. Your pace should be determined several times during practices. It is critical that you learn to walk the same way each time, and this takes training. Wearing the same shoes to each practice and the event can be a big help. Boots or tennis shoes work best.
Determining your Pace
On a level field or parking lot, mark off 100ft and mark each end with a flag, stake or cone. Walk between the two markers at least 5 times counting every other step. For example, if you start walking with your left foot, you will count every time your right foot touches the ground. Remember, a pace is equal to two steps. Complete the following chart to determine your pace.
| # of paces between 100ft markers – Trip 1 = ______ |
| # of paces between 100ft markers – Trip 2 = ______ |
| # of paces between 100ft markers – Trip 3 = ______ |
| # of paces between 100ft markers – Trip 4 = ______ |
| # of paces between 100ft markers – Trip 5 = ______ |
| Total (add the paces of all 5 trips) = ______ |
| Average # of paces (divide total by 5) = ______ |
| My Pace / Distance travel in each pace (divide 100 by average # of paces) = ______ |
Instead of paces, you may also count individual steps and complete the pacing course in the same manner.
Completing the Pacing Event
In the pacing event at the Forestry Field Day contest, Juniors must be able to calculate distance in feet by walking. Juniors will complete a pacing course where 4-H’ers walk from flag to flag. The total distance is estimated, and one number is turned in for the final score. Generally, the course is set up with four flags labeled: A, B, C & D. 4-H’ers will walk the distance from A to B, B to C and finally C to D. It is suggested that the course is walked more than once before determining the answer.
| Pacing contest example. Contestant has a 24-foot average pace. | ||
| Station | Number of paces | Distance in Feet Number of paces x 4ft./pace |
| A to B | 10 | 40 |
| B to C | 18 | 72 |
| C to D | 13 | 52 |
| Total | 134 | |
Compass and Pacing for Seniors
Prior to learning to use a compass and beginning to develop the skills need to complete a compass course, Senior 4-H’ers should determine their pace on a 100ft practice course. This pace will be used during the compass section to determine how many paces they should take to travel the required distance. Please refer to the section on Pacing for Cloverleafs and Juniors for determining your pace.
Using a Compass
A compass is designed to help the user determine his/her direction of travel by estimating the angle deflection from magnetic north. Magnetic north is the direction the compass needle points. Most compasses are designed to measure direction in either azimuths or bearings. Azimuths range from 0º to 360º. Bearings range from 0º to 90º in each of four quadrants (Figure 3). To use a compass correctly, you must know the different parts and how they function together. The customary parts of a handheld compass are listed below.
• The base plate is the section of printed information that forms the foundation. It usually is marked with a grid or ruler for use with a map.
• The index pointer and/or travel arrow is on the base plate and is pointed in the direction that you want to travel. On compasses that incorporate a mirror, the index pointer corresponds to the sight and sighting line located on the mirror.
• The compass capsule is the housing that contains the compass needle, orientation arrow and bezel
• The magnetic needle, usually with one end painted red always points to magnetic north and is the most important part of the tool.
• The bezel is the rotating ring that is labeled in ether azimuth or quadrants graduations.
• The orientation arrow is used to align the red compass needle to the true north direction.
Using a compass can seem complicated at first, but with practice, it is an easy skill to master. To find a particular direction of travel:
1. Always hold the compass level to allow the needle to rotate freely.
2. Set the compass to the desired bearing /direction of travel by turning the bezel until the bearing aligns with the index pointer.
3. Holding the compass at arm’s length, pivot or rotate your body in place until the magnetic needle aligns with the orientation needle. Using the mirror to look back at the compass housing will make it easier to align the two arrows while holding the compass at arm’s length.
4. Once the compass needles have aligned, sight across the notch at the top of the mirror and focus on an object in the distance that aligns with the compass. You can use this object as a focal point when you walk to help you walk in a straight line without using the compass.
Note: Focusing on a distance object is the preferred method rather than trying to continuously look at the compass while walking. If you are focused on the compass, you are less likely to be walking in a straight line, which can result in your path of travel to begin off course.
The compass used can be either in quadrants or azimuth (360 degrees) since both bearings are given at the contest. If you are using a compass for the first time, an azimuth compass if often easier to use and learn with. The following chart will give you a comparison of quadrants and azimuth to help you determine which type will be best for you.
Azimuth = Quadrants
45 degrees NE = north 45 degrees east
90 degrees E = due east
135 degrees S = south 45 degrees east
180 degrees S = due south
225 degrees SW = south 45 degrees west
270 degrees W = due west
335 degrees NW = North 45 degrees west
Completing the Compass Event
In the compass event at the Forestry Field Day Contest, Seniors will be given three compass bearings and distances. From a designated starting point, Seniors will follow these bearings using a hand compass and record an ending point for which you will be scored on. The course itself will be a rope that is typically tagged every five feet with numbers or letters. The starting point given will be represented on the rope, and the ending point recorded will be at some point on the same rope. The object of the event is to end as close as possible to the correct ending point. Before beginning a course, take the opportunity to check your pace on the 100ft practice course that is set up at the contest. Also, take the time to use a calculator and divide each of the three distances for the course by your pace so you know how many paces you need to take for each distance. Doing this before beginning the course will allow you to focus on the use of your compass.
Insect, Disease, and Disorder Identification
For this portion of the contest, 4-H’ers will learn to identify common insect pests, diseases and disorders that affect forest trees in Georgia. This is a valuable skill because most insects and disease that damage trees affect only certain tree species or groups of related species. Both insect epidemics and disease outbreaks can cause high dollar value damage in the forests.
Contest Rules
1. For the contest, Junior 4-H’ers will identify up to 10 insect and disease from the official Insect and Disease lists found in this manual. Seniors will identify an additional 5 specimens for a total up to 15.
2. Specimens for identification may include samples of the insect pest in the egg, larval or adult stage, damage caused by the insect on bark, leaves or branches and symptoms or signs for the disease. These may be presented as either a sample or high-quality image of a sample.
3. Junior 4-H’ers will be judged on the accuracy of identification. Names of all junior insects and diseases will be provided on the scorecard with blank lines next to each common name. Participants must write the corresponding specimen number on the blank line next to the common name of the specimen being presented. If a specimen is not present in this section, then the blank line should remain blank.
4. Senior 4-H’ers will be judged on the accuracy of identification and the spelling of the common names. Scientific names will not be required. Incomplete names such as caterpillar instead of eastern tent caterpillar will be considered incorrect. Spelling, including capitalization, must be the same as that on the Official Lists to be counted correct.
5. 4-H’ers will be given a specific time to identify the insect or insect damage specimens.
6. 4-H’ers may use a hand lens to aid in the identification of the sample. However, 4‑H’ers may not touch, move or handle the samples during the contest.
7. 100 points will be allowed for the Insect and Disease portion of the contest. Points will be allocated based on the number of specimens provided. For senior participants incomplete or misspelled, but identifiable common names will receive ½ credit.
Reference Material
https://www.bugwood.org/
Official List of Insects for Georgia 4-H Forestry Field Day
Insect List for Juniors and Seniors
Common Name – Scientific Name
1. aphids – Homptera: Aphididae spp.
2. bagworm – Lepidoptera: Psychidae spp.
3. black turpentine beetle – Dendroctonus: terebrans
4. conifer sawfly – Hymenoptera: Diprionidae spp.
5. eastern tent caterpillar – Malacosoma americanum
6. fall webworm – Hyphantria cunea
7. gypsy moth – Lymantria dispar
8. insect gall – Cynipidae spp.
9. Ips engraver beetle – Ips spp.
10. Japanese beetle – Popillia japonica
11. locust borer – Megacyllene robiniae
12. Nantucket pine tip moth – Rhyacionia frustrane
13. pales weevil – Hylobius pales
14. periodical cicada – Magicicada septendecim
15. pine webworm – Tetralopha robustella
16. southern pine beetle – Dendroctonus frontalis
17. white pine weevil – Pissodes strobi
Additional Insects for Seniors Only
18. Asian ambrosia beetle – Xylosandrus crassiusculus
19. bronze birch borer – Agrilus anxius
20. leaf cutting ant – Atta texana
21. locust leafminer – Odontota dorsalis
22. hemlock wooly adelgid – Adelges tsugae
23. orange-striped oakworm – Anisota senatoria
24. sycamore lace bug – Coruthucha spp.
25. tussock moth – Lepidoptera: Lymantriidae spp.
26. twig girdler – Oncideres cingulata
27. two-lined chestnut borer – Agrilus bilineatus
28. variable oakleaf caterpillar – Heterocampa manteo
29. walkingstick – Diapheromera femorata
30. white oak borer – Goes tigrinus
Official List of Diseases and Tree Disorders for Georgia 4-H Forestry Field Day
Disease and Disorders List for Juniors and Seniors
Common Name – Scientific Name
1. annosus root rot – Heterobasidion annosum
2. black knot – Apiosportina morbosa
3. cedar-apple rust – Gymnosorangium juniperi-virginianae
4. fusiform rust – Cronartium fusiforme
5. Hypoxylon canker – Hypoxylon spp.
6. lichens – numerous species
7. mistletoe – Phoradendron spp.
8. Neonectria canker – Neonectria galligena
9. oak leaf blister – Taphrina caerulescens
10. pine needle rust – Coleosporium spp.
11. powdery mildew – Microsphaera spp. and Phyllactina spp.
12. sooty mold – Capnodiaceae and Dothideales
13. tar spot – Rhytisma spp.
14. witches broom – Various agents
Additional Diseases for Seniors Only
15. artist’s conk – Ganoderma applanatum
16. brown spot needle blight – Scirrhia acicola
17. chestnut blight – Cryphonectria parasitica
18. dogwood anthracnose – Discula destructiva
19. Dutch elm disease – Ceratocystis ulmi
20. needle cast – Hypoderma and Lophodermium
21. oak wilt – Ceratocystia fagacearum
22. red heart of pine – Porodaedalea pini
23. white pine blister rust – Cronartium ribicola
Forests Site Evaluation
Every acre of land should be devoted to its best use. This is an idea that landowners have had about agricultural land for many years. Level and slightly rolling land was used for row crops and grain, rolling and better upland slopes for pasture and meadow. The general ideas about forest land are that forests will grow well on all lands not suited for other crops. This is not correct. There are excellent, good, fair, and poor sites for timber production just as there are different kinds of farm crop land. There are forest lands that will economically support cultural practices and permanent physical improvements, and other stands in the same area might barely pay land taxes. There are acres that can be harvested every 10 years, and there are other acres that may never produce commercial timber. Forest Evaluation is based on the premise that trees will be harvested, now or in the future, to maximize the goals of a specified landowner.
Contest Rules
1. Forest Site Evaluation is a team event conducted at the State level contest only. Four team members from a county are selected to complete the site evaluation. This is not an individual event.
2. Forest Evaluation is divided into four parts: I Site Evaluation, II. Forest Stand Evaluation, III. Forest Inventory, and IV. Recommended Practices.
3. Competing teams will be given a situation description for the plot designated for the event. The situation will include information about the landowner and his or her management objectives.
4. Contestants may use a tree scale stick and compass with a clinometer to complete the site evaluation portion of the contest. A volume table will be provided.
5. A total of 100 points are possible for site evaluation. Point allocation is based on the designated plot and the management object. Points earned are added to the total team score.
Forest Stand Evaluation
• Grazing damage is defined by the following categories for the purpose of this contest: Grazed – tree seedlings eaten or trampled, soil compacted, and bark rubbed off, and Ungrazed – no evidence of grazing damage.
• Fire may be present as a destructive agent or a management tool. Wildfire can be very destructive particularly in hardwood forests. Destruction of the litter layer on the forest floor, crown scorch or burning of the foliage, and scalds or scars on the tree trunks are all evidence of wildfire damage. A prescribed fire or controlled burn is a forest management tool which can be used to manage competing vegetation, prevent fuel accumulation, and improve wildlife habitat without damaging the crop trees.
• Size distribution is classified into 4 categories for the purposes of this contest. In many stands of timber more than one size class is represented. Specific size classes are defined as follows: trees less than 1 inch in diameter – reproduction, trees from 1 to 3 inches in diameter – saplings, trees 4 to 10 inches in diameter – poles, and trees more than 10 inches – sawtimber.
• Forest types are different from each other in species composition and management requirements. The following forest types, defined by the Society of American Foresters in Forest Cover Types of North America, are used in this contest:
1. Pine Type – Across the state, pine represents our most important commercial forest resource. Pine stands are managed to produce a variety of forest products including pulp, poles, saw timber, naval stores, and pine straw. From the Piedmont north, loblolly pine and shortleaf pine are the most common species. In the Coastal Plain, slash pine, loblolly pine, and longleaf pine are found. In each region other less common pine species can occur. Pines will constitute greater than 50% of the stand.
2. Oak-Pine Type – This type is found from the Mountains into the Coastal Plain, upland oaks (see oak-hickory type) make up 50 to 75 percent of the stand, with pine constituting 25 to 50 percent of the stocking. This type is one of the transitional stages from pine dominated forests to climax forests of oak and other hardwoods. As pine is harvested or dies from lightning strikes, wind throw, insects and disease, the more tolerant hardwoods claim their place at the expense of pine regeneration. As the pine component continues to decline, the type shifts to oak-hickory.
3. Oak-Hickory Type – This type can contain a variety of oak and other associated species. Common are southern red, white, scarlet, northern red, black, and post oaks. Shagbark, pignut, and mockernut hickories, blackgum, sweetgum, yellow-poplar, beech and other assorted species (including scattered pines) are common in this type. This type represents a transition from the oak-pine type as the pine component declines. (Pine stocking is less than 25 percent; see “Oak-Pine Type.”) While this type contains valuable commercial species, and has value for wildlife and aesthetics, many stands may contain poor quality stems with little commercial value because of past harvesting and utilization practices in which only the highest quality stems were harvested.
4. Cove Hardwood Type – In the southern Appalachian Mountains, coves and moist slopes with deep well-drained soils are some of the most productive hardwood sites in the state. Yellow-poplar, basswood, northern red oak, white oak, black oak, white ash, sugar maple, black cherry, and hickories are common associated species.
5. Bottomland Hardwood Type – This is a diverse type comprised of numerous species throughout the state. In the Piedmont along wider streams and rivers, terraces adjacent to the water courses support highly productive hardwood stands. As you move south in the state into the Coastal Plain, broad stream bottoms, wet flats, sloughs, and marshes (swamps) support nearly pure stands of hardwoods. Common species are swamp chestnut oak and cherrybark oak on rich deep soils along major river and stream terraces. On somewhat more poorly drained sites closer to water’s edge, sweetgum and willow oak are common along with various elm, ash, and other hardwoods. On the very poorly drained wet flats and sloughs, overcup oak, water hickory, water and willow oak, black and water tupelo, red maple and cypress are common. In permanent ponds, cypress and water tupelo are often the only trees found.
• Stand origin can vary from one stand to another, even though the stands are of the same forest type and size distribution. Timber stands may originate by several different means. Natural stands may arise from seedlings, sproutsor a mixture of both. Sprouts, also known as coppice, can be from either cut stumps or root suckers. Sprouts are important sources of new trees in the regeneration of most hardwood forests. Stands which originate from planted seedlings are called plantations. These stands may be of higher quality than their predecessors if genetically improved seeds or seedlings are used.
• Stocking is a term used to describe how well the trees in a stand utilize the available space. Stocking, for the purposes of this contest, is measured using the average diameter of all trees 10 inches DBH and larger, and the number of trees per acre 10 inches DBH and larger. A well-stocked stand is one in which the trees are well distributed, and all the space is utilized, but the trees still have room to grow. An understocked stand is one in which there are open spaces between the trees so that the stand will not produce its full potential. An overstocked stand is one which is so crowded that trees are growing very slowly, and some may be dying because of too much competition.
For example: If the plot size is 1/10-acre, average DBH of trees 10 inches DBH and larger is 16 inches and the number of trees in the plot 10 inches DBH and larger is 12, is the stand understocked, well-stocked or overstocked? If there are 12 trees in a 1/10-acre plot there are 120 trees per acre. Look at the Stocking Guide and find 120 trees per acre on the Y-axis. Now find 16 inches DBH on the X-axis. Extend the trees per acre horizontally toward the right and the DBH vertically toward the top until they intersect. The point of intersection falls in the part of the Stocking Guide labeled “overstocked.” This means the plot is overstock
For Georgia 4-H events, the plot size for site evaluation will be equal to 1/10 of an acre with a plot radius of 37.24 feet. The center of the plot will be marked and each tree that should be measured to determine stocking will be flagged. Team members should measure each flagged tree and use scratch paper to determine the average diameter for stocking purposes. The score card should only be marked to indicate whether the plot is under stocked, over stocked, or well stocked. The score sheet does not contain an area to determine the average diameter or record individual diameters of the flagged trees. This should be done on scratch paper.
Forest Inventory
Species of each numbered tree should be listed using the common names from the Official Tree List.
Crown class of each tree should be determined and recorded as either dominant, co-dominant, intermediate, or suppressed. These crown classes are defined in the Glossary.
DBH(diameter at breast height) of each tree should be measured and recorded to the nearest even 2-inch diameter class.
Height (in 16-foot logs) of each tree should be measured and recorded to the nearest full half-log.
Board-foot volume per acre – The board-foot volume of each tree should be determined and recorded using the volume table provided at the contest. Then, after considering the plot size, the board-foot volume per acre should be calculated.
Tree value per acre – The dollar value of each tree should be determined by multiplying the volume of each tree, expressed in thousand board feet, by the value of that species per thousand board feet. Values for each species will be given in the written situation description. For example: if a 20-inch, 2½ log white oak contains 348 board feet, and white oak sells for $300 per thousand board feet, then the value of the tree equals $300 X 0.348 = $104.40. Then, after considering the plot size, the tree value per acre should be calculated.
Recommended Practices
A list of forest management practices appears on the Forest Evaluation Score Sheet. Each team will be given a written scenario with information about the landowner and his or her objectives for management. Based on the data you collected about the site and forest stand, and on the landowner’s management objectives, consider each practice listed on the score sheet. Mark the practices you recommend. The practices recommended should be those which will improve the stand and help accomplish the landowner’s objectives.
Sample Scenario – Ben and Deloris Cloverstein are a couple in their late forties. Their twins will be starting college next fall, and they are looking to the 40-acre woodlot to supply them with some cash to help pay for some of the college expenses. Ben enjoys hunting deer and turkey on his property and often invites one or two friends to hunt with him. They would not want any activity in their woods to damage the wildlife habitat. They have owned the woodlot for about 20 years and have managed it diligently over that time. They have a Stewardship plan that was drawn up right after they purchased the property, and it has been updated once since then. Local markets are good with red oak worth $300, white oak worth $250, and mixed hardwoods worth $200 per thousand board feet on the stump. After your inventory and observation of their woodlot, what recommendations would you make that would help them meet their objectives at this time?
Thinnings are partial cuttings in even-aged timber stands. They are designed to improve future growth by regulating stand density. Thinnings can be commercial, where some or all the wood harvested is put to use, or precommercial, where no wood is utilized.
Salvage or Sanitation Harvests are cuttings by which the dead, dying, damaged, or deteriorating trees are removed to prevent the spread of pests as well as putting this “at risk” wood to use.
Selection Harvest is a regeneration method used in uneven-aged stands, or to create uneven-aged stands, in which individual trees or groups of trees are removed. Some trees in each age class are removed including mature trees, poorly formed trees, and trees of undesirable species.
Shelterwood or Seed Tree Harvests are regeneration methods designed to create an even-aged timber stand. These harvests remove the mature stand leaving only a few trees for seed or to shelter the new stand.
Clearcutting is a regeneration method that involves the removal of the entire stand in one cutting to create an even-aged stand. Regeneration is provided for naturally, where desirable tree species seedlings or seed exists, or artificially through planting, where conversion to a more desirable species is recommended.
Prescribed Burning is generally used as a means of controlling hardwood vegetation in softwood stands. Prescribed burning also improves wildlife habitat, stimulates sprouting seed germination, and encourages the growth of herbaceous plants.
Wildlife Habitat Improvement – Wildlife will generally coexist with any forest management scenario, but the type of wildlife will vary depending on the management system a forester employs. Most wildlife species prefer a varied landscape with many edges and riparian zones. The type of wildlife a forester manages for is largely dependent on landowner objectives but also the type of forest a particular site will support
Recreational Opportunities – Recreation often goes together with forest management. Hiking, hunting, fishing, cross-country skiing, ATV riding, mountain biking, and bird watching are only a few of the types of recreation for which a forester might manage a forest. The ultimate decision should be largely based on the objectives of the landowner.
Non-Timber Forest Products – This area of forest management can work simultaneously with other forest management practices and is more developed in some regions of the United States such as the Pacific Northwest. It may be a hobby for some landowners yet can also generate a significant cash income for other landowners. Such things as Ginseng, St. John’s Wort, and a whole host of mushroom species are items that a forester should be aware of and could be managing for given proper site conditions.
Glossary of Forestry Terms
Abney Level: An instrument used to determine the percent of slope on a site.
Aspect: A compass reading taken facing down a slope in the direction water would run; gives the compass direction.
Clinometer: Height measuring device.
Conservation: Gifford Pinchot, a turn-of-the-century forester closely associated with President Teddy Roosevelt, applied the word to describe a natural resource philosophy. It meant “wise use.” Through the years it has taken on an extended meaning that really says, “wise use over a period of time.” The time factor forces us to consider the consequences of current use compared to future use.
Coppice: A stand of trees originating from sprouts on stumps or roots of trees previously cut. Most hardwood species sprout readily when cut young. Few conifers will sprout from the stump.
Crown Class: Tree crowns are classified as to the position in which they are found. The following are the generally recognized classes:
Dominant: Trees with crowns that extend above the average tree crowns and receive light from directly above and some from the sides.
Co-Dominant: Trees with crowns that form the general crown level of a stand and receive full light from the top, but little from the sides.
Intermediate: Trees shorter than the two preceding classes but with some branches extending into the general crown and receives little direct light from above and from the sides.
Suppressed: Trees with crowns entirely below the general crown level and receive no direct light either from above or below
Cull: Tree or log of merchantable size, but with no market value.
DBH: Diameter of a tree at breast height or 41/2 feet above ground on the uphill side of the tree.
Duff: Often referred to as litter, which is made up of materials on the upper layer of the forest floor. This includes freshly fallen leaves, twigs and slightly decomposed organic matter.
Erosion: The wearing away of the soil by agents such as wind, water, and gravity.
Exposure: That portion of the slope that is directly in the path of wind, rain, and sun. That part of a slope opens to action of the elements.
Forest Land Capabilities: The productivity of the land as it is affected by location or position on a slope.
Forest Types: A classification of a site indicating the major tree species present, or the major species represented in an area.
Germination: This process occurs when viable seed meet favorable conditions that will allow it to grow.
Girdle: To chop or remove a strip of bark, or a section of wood containing the food-carrying tissue of a tree, in an even strip around the perimeter of the tree or twig.
Harvest: The removal of marketable products from the forest.
Mature Tree: A tree that has reaches a size that the forest manager decides is a merchantable product.
Merchantable Height: A term used to indicate the marketable length of a tree.
Multiple Land Use: A term used to indicate the management of timber, wildlife, grazing, water and recreation in an integrated, consolidated program.
National Forests: These differ from National Parks in that recreation is not their only use. Recreation may be a primary use in one part of the National Forest. For example, there are more acres of wilderness areas in National Forests than in National Parks. The National Forest system administers 154 forests and 19 grasslands. On most National Forest land timber, water, wildlife, recreation, and grazing are compatible resources. These are managed for productive and sustained yields according to the land’s capability.
National Parks: The National Park Service was established by Congress to promote and regulate the use of national parks, monuments, and reservations and to conserve the scenery and the natural and historic objects and any wildlife therein. The Park Service administers 295 separate areas. The Park Service manages some areas for historical or recreational uses. Each of the 35 national parks was established to preserve a unique natural area for our enjoyment and study. National parks are often confused with National Forests.
Old Growth: This term describes forests with trees over 100 years of age.
Partial Cut: Method of cutting mature trees, such as shelterwood cut, selection cut, or seed tree cut.
Pole Timber: A young tree that is 3-12″ in DBH.
Prescribe Burn: Control burning to enhance forest management techniques in Silviculture, wildlife management, fire hazard control, etc.
Preservation: In natural resources, other than wood preservation, this term is related to land use. The meaning stems from 19th century land reserves wherein areas and resources were set aside for limited or restricted use and development. Preservation often restricts land to recreation or scientific study. Preservation may be contrasted to the principle of multiple use which rather intensively develops one or more of an area’s resources.
Reproduction: A natural establishment of seedlings or sprouts 0-1″ DBH.
Residual Stand: Trees left after any partial cut.
Sanitation Cutting: The removal of dead, damaged, or susceptible trees; essentially to prevent the spread of pests or pathogens and so promote forest hygiene.
Sapling: A young tree less than 3″ DBH. The minimum size is usually placed at 1″ DBH.
Seedling: A tree grown from seeds.
Silviculture: A term used to indicate the establishment, development, care, and reproduction of stands of timber.
Site: The combination of biotic, climatic, soil, and ecological factors and conditions of an area that produce forests or other vegetation.
Slope Position: A particular location on a slope, e.g. upper, middle, or lower slope, ridge top, or bottom land. A specific topographic location.
Sprout: A tree originating from a root or stump.
Stocking: A measure of the proportion of the area occupied by trees.
Sustained Yield: Management of a forest stand to provide a constant supply of timber and revenue.
T.S.I.: Timber Stand Improvement – Any practice designed to improve a stand of timber by removal of vines, culls, and undesirable species.
Wilderness: In the strictest sense, this means an area that has never been developed by man. A 1964 Wilderness Act defined it thus: “A wilderness, in contrast with those areas where man and his own works dominated landscape, is hereby recognized as an area where the earth and its community of life are untrampled by man, where man himself is a visitor and does not remain.” In common use, the word is associated with these undeveloped areas and those set aside with a little development. In some cases, man-made items are dismantled to reduce the area to a primitive state. Under these broader uses, some roadless areas are considered wilderness when access is limited to hiking, canoeing, or horseback riding and use is set aside for recreation. To most of the public, wilderness experiences are gained in a number of settings involving wild but not necessarily true Wilderness areas.
Wildfire: Fires burning out of control, regardless of how or why they were started.
Wolf Tree: A tree that occupies more than its fair share of growing space.